Lesson Objectives
On completion of this lesson, you will be able to understand
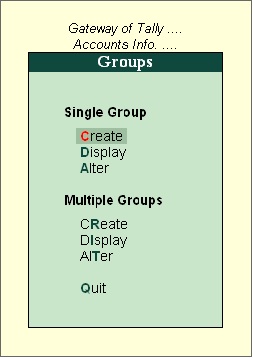
Go to the Gateway of Tally > Inventory Info.
The Inventory info. menu is displayed as shown:
 The above Inventory Masters types are explained in detailed in the following sections.
Given below is the structure of items being sold.

The televisions are sold in numbers. Hence, the Unit of Measure will be Nos.
Indus Enterprises has two Godowns, the Bangalore Godown and the Mumbai Godown.
The grouping structure in Tally.ERP 9 is as follows:
Stock Group
1. Televisions (main stock group)
Experiment Creation of Inventory Masters in Indus Enterprises.
Stock Groups
Stock Groups are provided to help in the classification of stock items. Classification is done based on some common behaviour. Grouping stock items makes it easy to identify and report them in the statements. For example, items of a particular brand can be grouped together so that you can get the inventory details of all the items of that brand.
Creating Stock Group

ii. Create Sony TV under Televisions.
Press Y or Enter to accept the screen.
Practice Exercise
Create the following Stock Groups in the similar manner

On completion of this lesson, you will be able to understand
- The basic functions of the Tally.ERP 9 Inventory System
- Creating and maintaining Inventory Masters
- Creating and maintaining stock details
- Creating stock items and entering opening balances
- First you set up the inventory details, which is a similar operation to creating the chart of accounts although, in this case, there are no pre-defined set of stock groups.
- Second, you create the individual stock items, which is similar to setting up the ledgers.
Go to the Gateway of Tally > Inventory Info.
The Inventory info. menu is displayed as shown:
- Units of Measure
Given below is the structure of items being sold.

The televisions are sold in numbers. Hence, the Unit of Measure will be Nos.
Indus Enterprises has two Godowns, the Bangalore Godown and the Mumbai Godown.
The grouping structure in Tally.ERP 9 is as follows:
Stock Group
1. Televisions (main stock group)
- Sony TV – stock group under Televisons
- Philips TV – stock group under Televisons
- Videocon TV – stock group under Televisons
- Sony Music Systems – Stock Group under Music Systems
- Videocon Music Systems – Stock Group under Music Systems
Experiment Creation of Inventory Masters in Indus Enterprises.
Stock Groups
Stock Groups are provided to help in the classification of stock items. Classification is done based on some common behaviour. Grouping stock items makes it easy to identify and report them in the statements. For example, items of a particular brand can be grouped together so that you can get the inventory details of all the items of that brand.
Creating Stock Group
- Create the Stock Group – Television under Primary.
- Go to the Gateway of Tally > Inventory Info. > Stock Groups > Create (under the Single Stock Group).
- Press Y or Enter to accept the screen.
ii. Create Sony TV under Televisions.
Press Y or Enter to accept the screen.
Practice Exercise
Create the following Stock Groups in the similar manner